Lippan Art Kit and Materials: Clay, Mirrors and a Step by Step Tutorial
12 designs Lippan art Updated 9 Oct 2026
A good lippan art kit has only a few things in it: clay, small glass mirrors, a flat base, glue and a couple of simple tools. Get these right and the rest is patience. This page shows each material up close, then walks you through a full piece from pencil sketch to final coat.
Lippan is the mud and mirror relief work of Kutch in Gujarat. Women of communities such as the Rabari traditionally pressed it onto the inner walls of bhungas, the round mud houses of the region, using a mix of clay and dung. Today most hobby artists work on MDF board with air-dry clay or shilpkar clay, which is lighter, cleaner and easy to buy in small packs.
If you want ideas before you shop, browse our lippan art designs gallery or the painted pieces on the modern lippan art page. For the history and meaning of the craft, start at lippan art.
What Is Inside a Lippan Art Kit
Most kits look similar once you open the box. These three flat lays show a full starter set, a refill pack and a small travel set for a class or workshop.
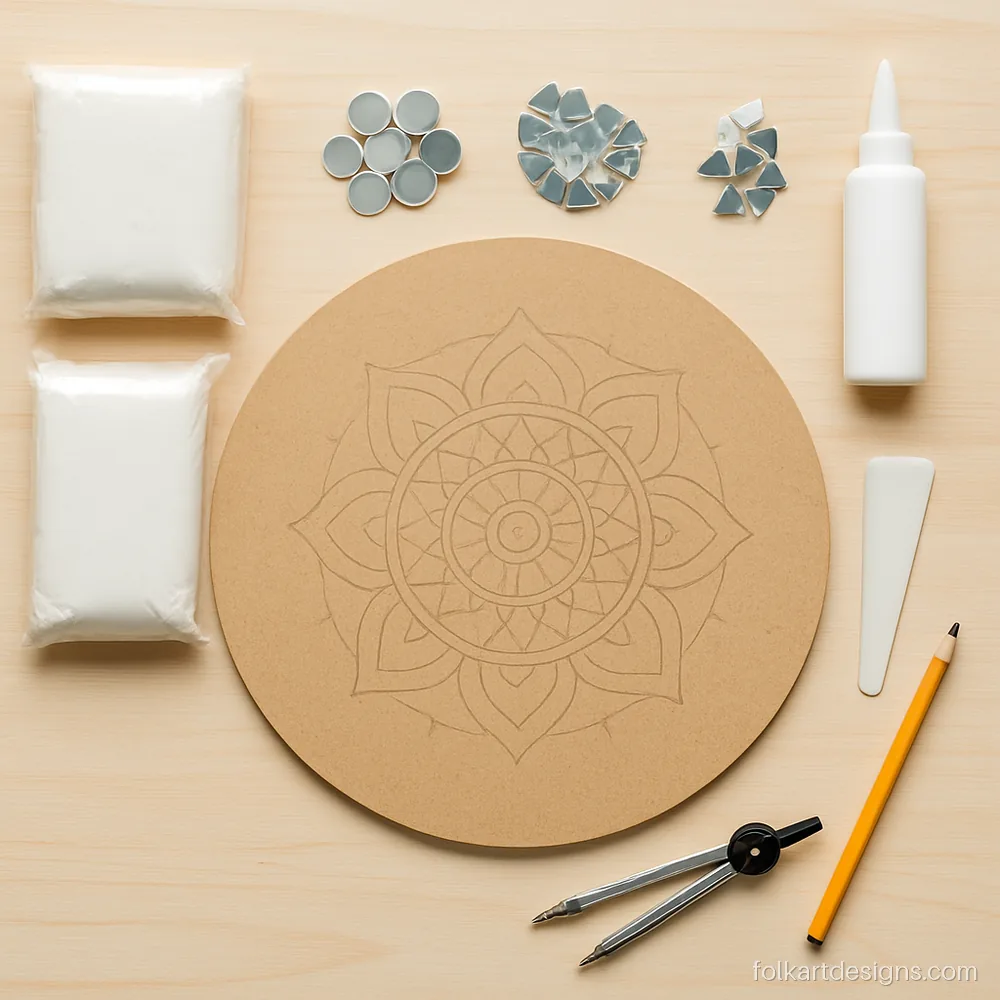
A full starter set: one 12 inch MDF circle, two packs of white clay, about 150 mirrors in three shapes and a tube of glue. Enough for one medium wall piece.
Artist tip Count your mirrors before you start. Running short halfway through a ring spoils the symmetry.
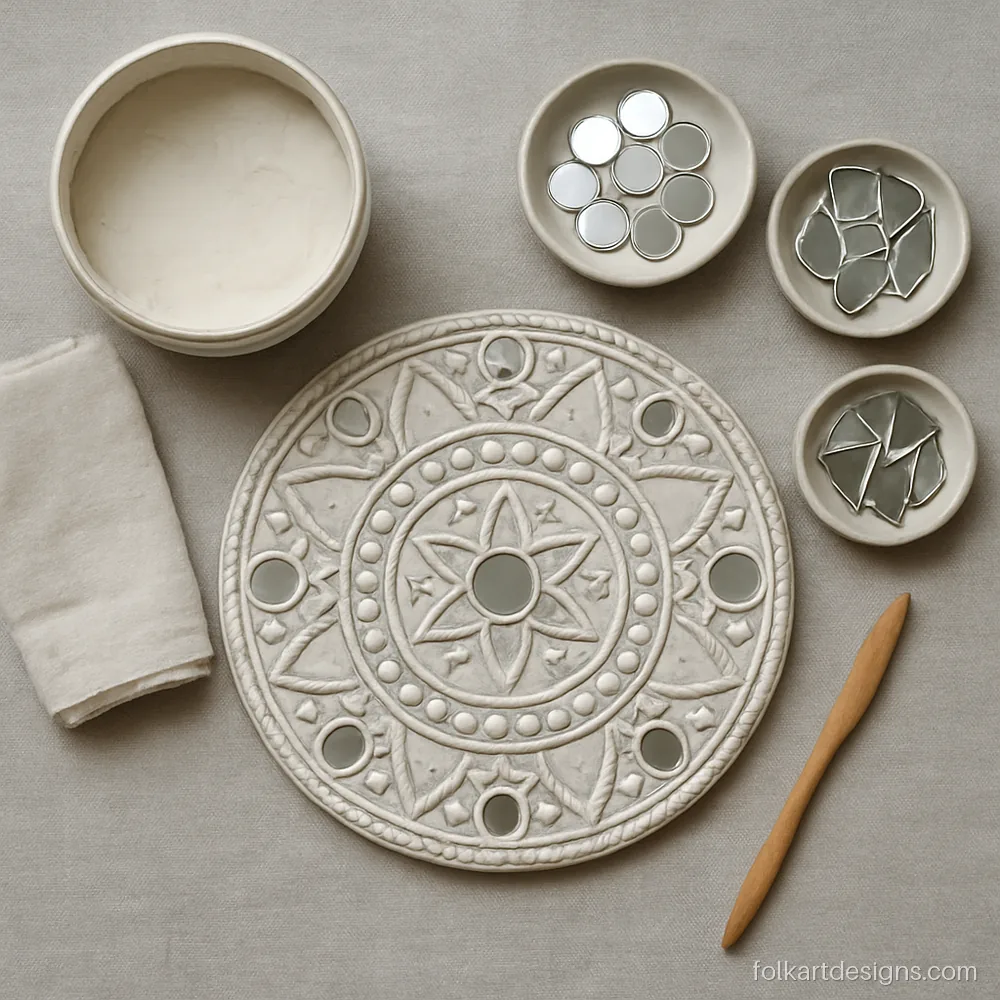
Once you have tools, you only need refills. A tub of clay and sorted mirrors keep the cost low for your second and third pieces.
Artist tip Keep opened clay in an airtight box with a damp cloth on top so it stays soft for days.
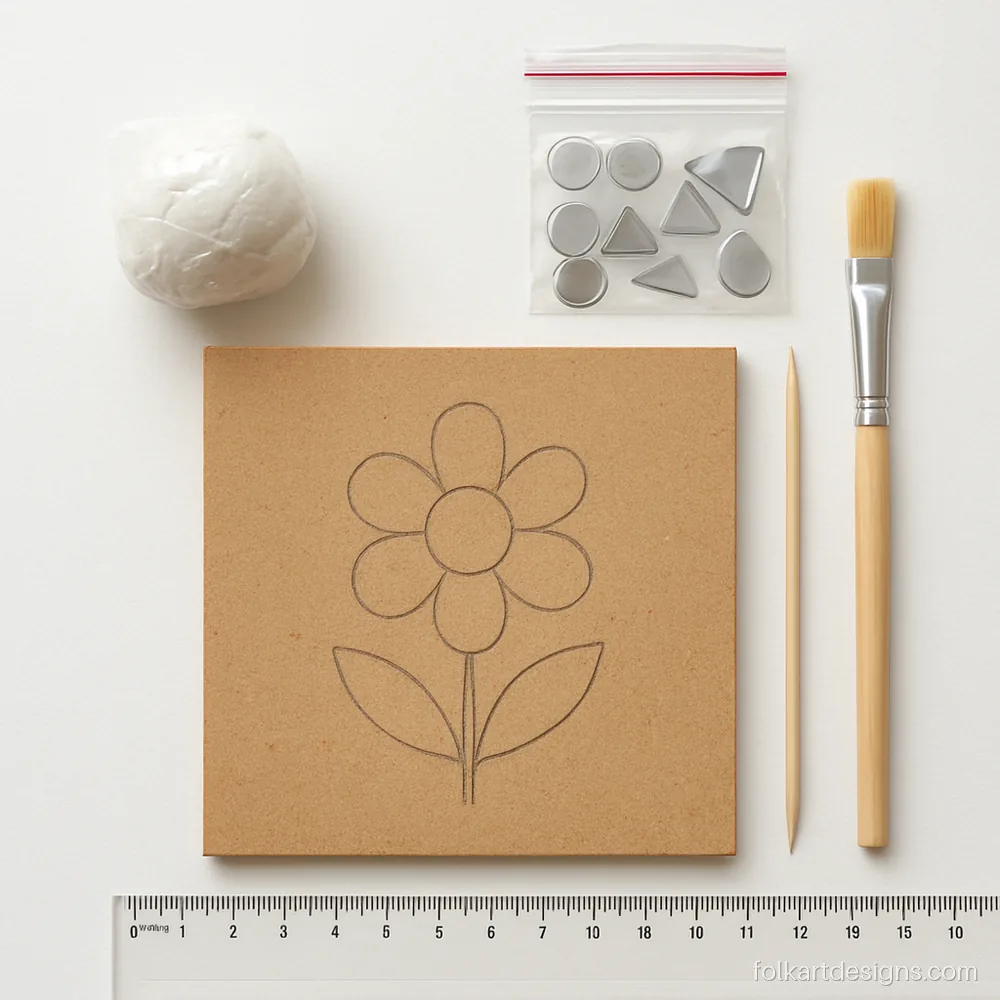
A 6 inch square board with a printed outline makes a neat class set. Students finish in one sitting and take home a coaster sized piece.
Artist tip For a class of 20, pre-sort mirrors into small zip pouches so nobody waits.
Lippan Art Clay: Traditional Mud vs Air-Dry and Shilpkar Clay
The clay used in lippan art decides how heavy, how smooth and how long lasting your piece will be. Here are the three you will meet most often, side by side.
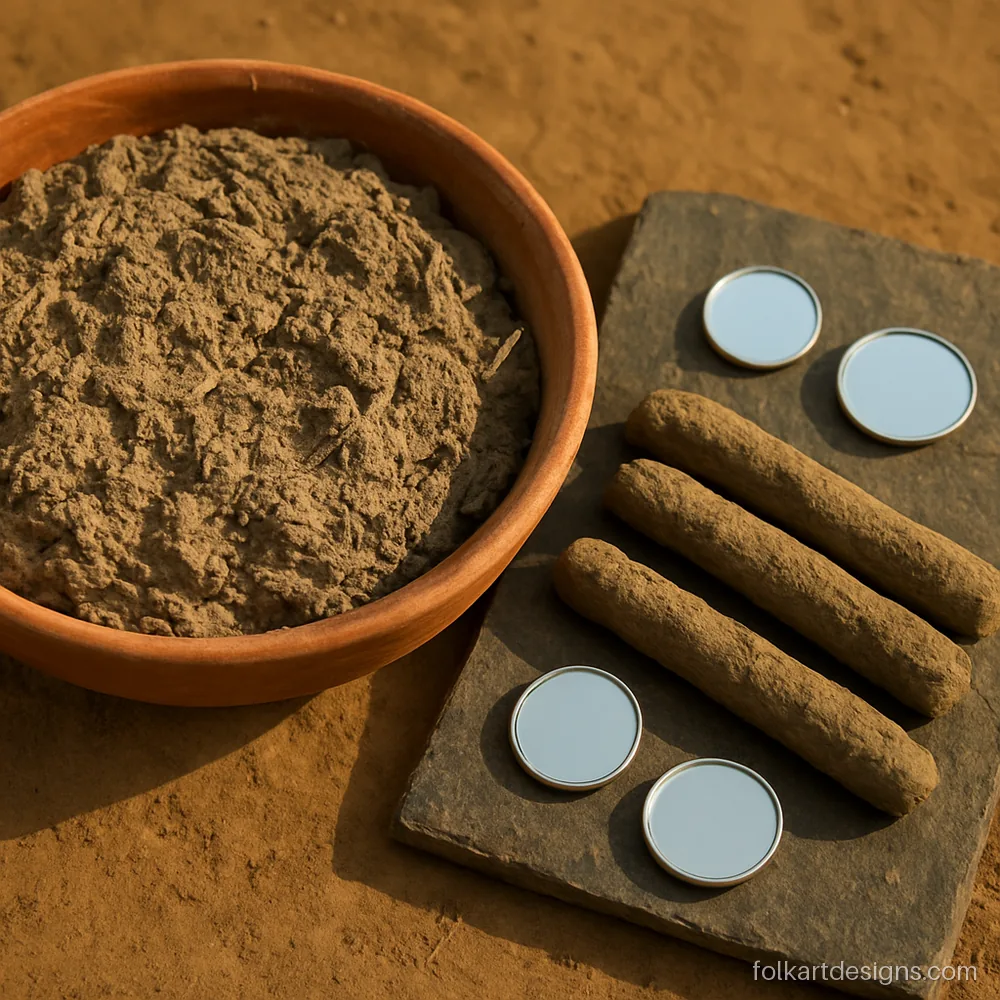
The old village recipe: local clay mixed with dung and water, kneaded until it holds a coil. It dries a warm grey and suits a mud wall best.
Artist tip Traditional mud cracks on MDF. Use it only on a mud or lime plastered surface.
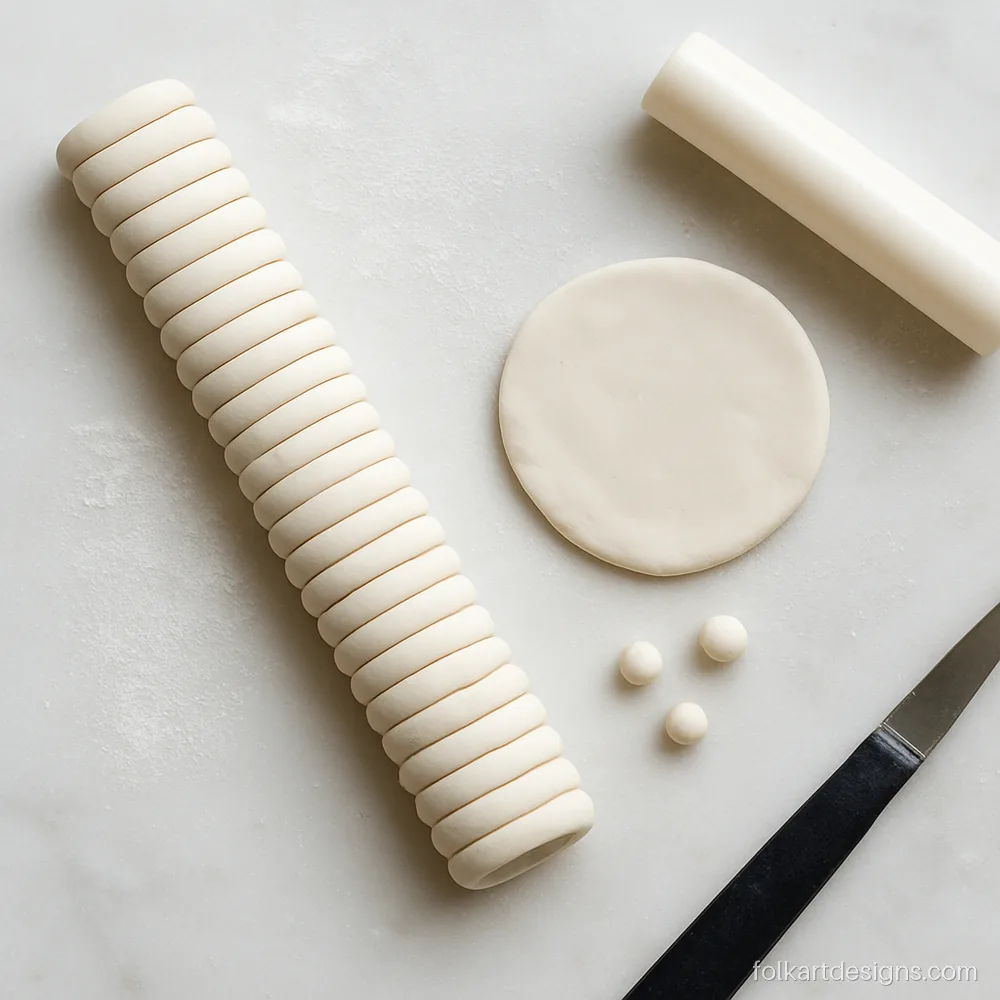
Air-dry clay is the easiest lippan kaam clay for beginners. It rolls into even 3 mm coils, stays white and dries in a day without baking.
Artist tip Dust your slab with a little talc so thin coils do not stick and tear.
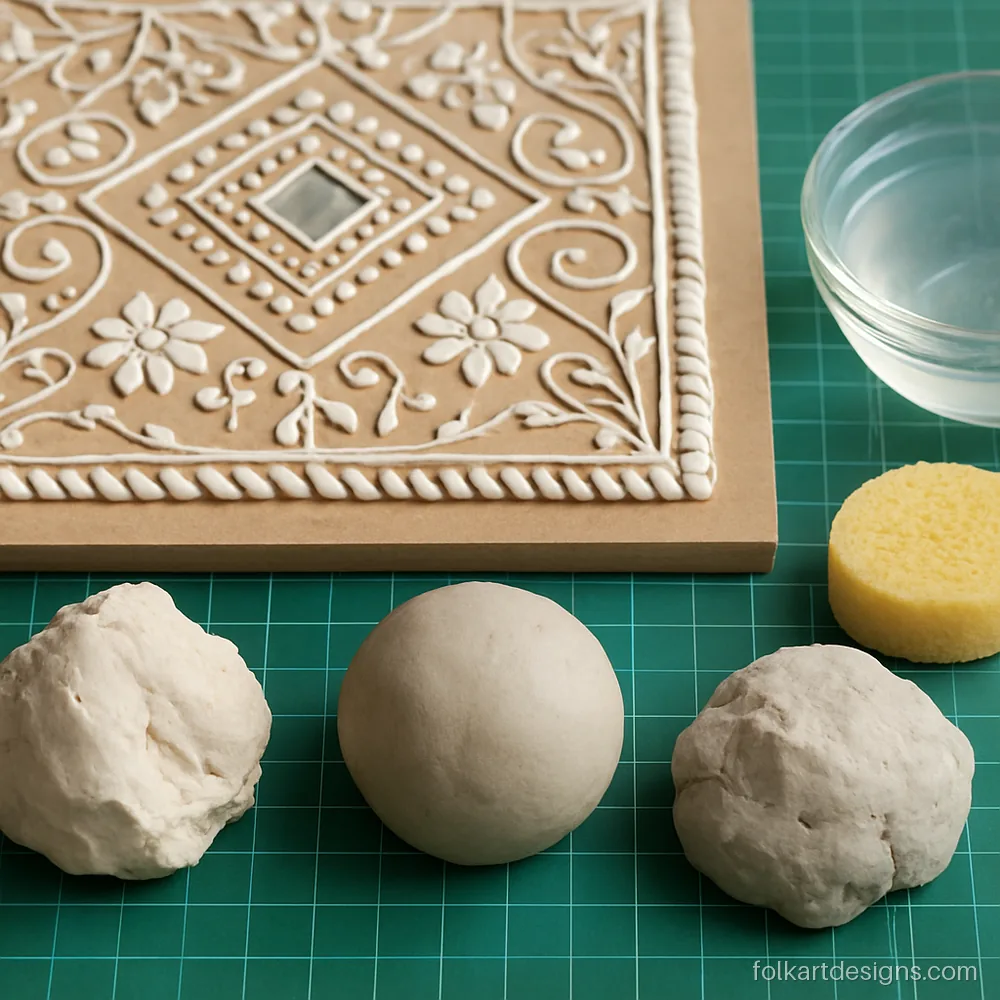
Shilpkar clay comes in two parts that you knead together. It sets harder than air-dry clay, so it suits pieces that will hang in a busy hallway.
Artist tip Mix only what you can use in 40 minutes. Shilpkar starts to firm up after that.
Lippan Art Materials List
Here is a complete lippan art materials list for one 12 inch wall piece. A ready lippan art kit usually covers the first five lines. The rest you probably have at home.
| Material | What to look for | Amount for 12 inch piece |
|---|---|---|
| MDF board | 3 mm for small, 5 to 6 mm for large pieces | 1 board |
| Lippan art clay | White air-dry clay or two-part shilpkar clay | 400 to 500 g |
| Mirrors | Round 8 to 25 mm, diamond, triangle, drop | 120 to 180 pieces |
| Glue | White craft glue that dries clear | 1 small bottle |
| Primer or base paint | Matt acrylic in white, black or terracotta | 1 coat |
| Tools | Compass, HB pencil, eraser, toothpicks, clay knife | 1 each |
| Finishing | Small flat brush, water cup, clear matt varnish | Optional |
What pushes the cost up: thicker boards, larger sizes, real glass mirrors instead of plastic, and shilpkar clay over basic air-dry clay. A kit with plastic mirrors is cheaper, but the shine is flat and the edges scratch. For a deeper look at pens, papers and compasses used in mandala work, see our mandala art supplies page.
Lippan Art Materials List: Mirrors, MDF Base and Glue
These are the materials required for lippan art besides clay. Mirror shape and size change the whole look, so pick them before you draw.
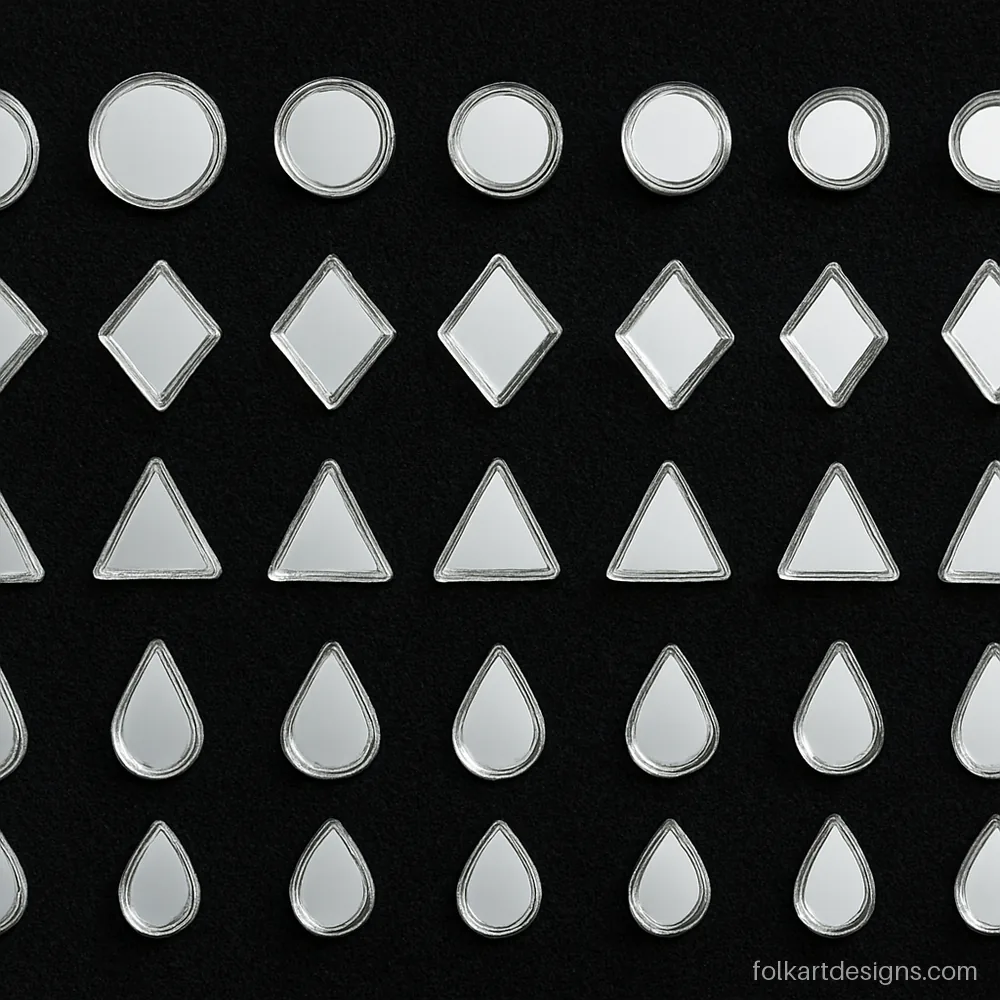
Round mirrors from 8 to 25 mm fill the centre and rings. Diamonds and triangles sharpen the corners. Drops make the petals.
Artist tip Buy round mirrors in two sizes. Big ones in the centre, small ones near the edge, looks balanced.
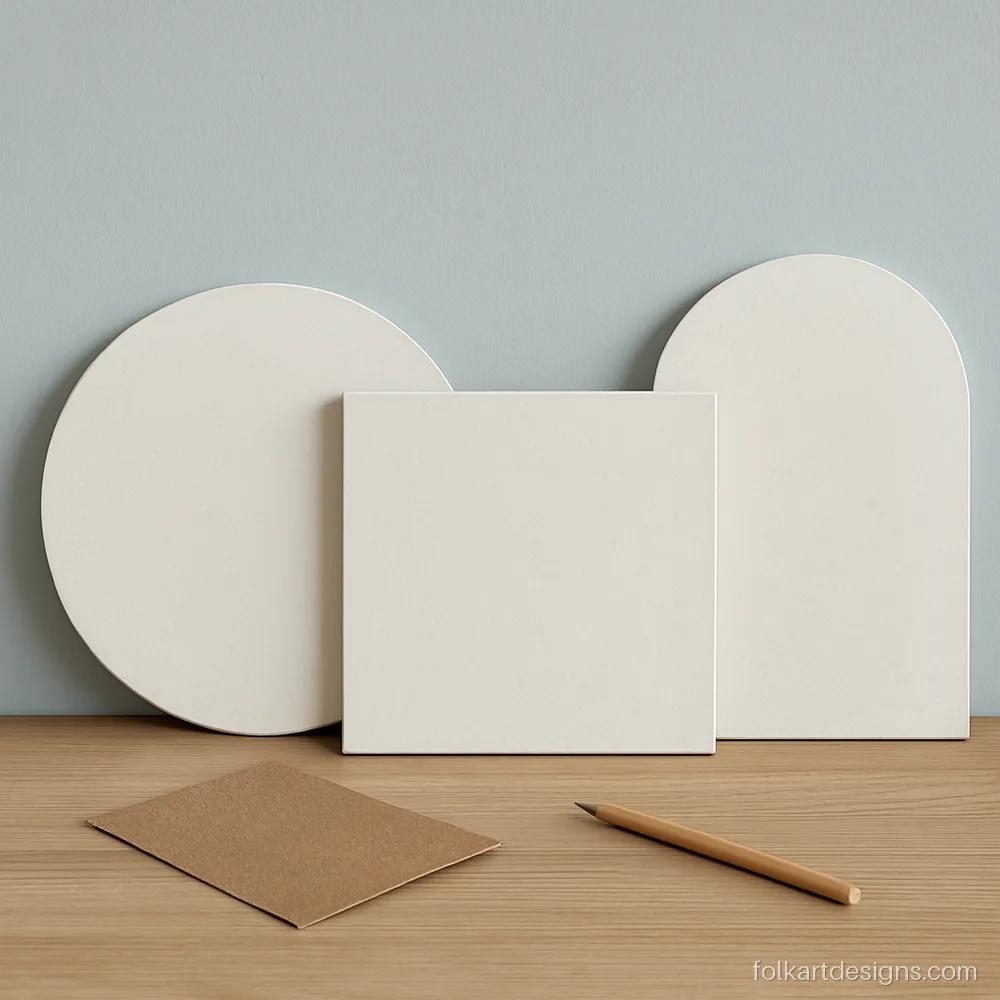
MDF is light, flat and takes glue well. A 3 mm board suits small pieces. Use 5 or 6 mm for anything over 12 inches so it does not bend.
Artist tip Sand the edges lightly and prime the board with one coat of paint before drawing.
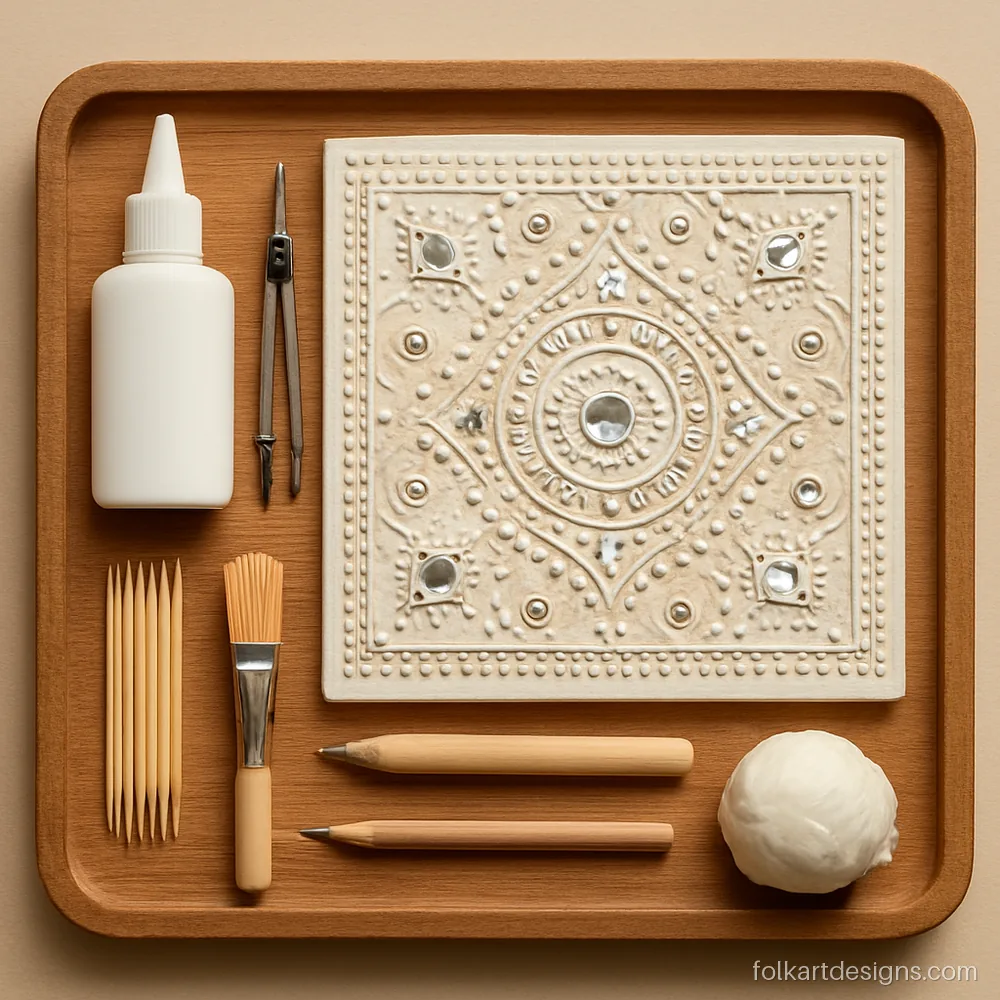
The small tools matter too: white craft glue, a compass, toothpicks for lifting mirrors, a damp brush for smoothing joins and a blunt knife.
Artist tip Choose a glue that dries clear. Cloudy glue shows around every mirror on a white piece.
How to Do Lippan Art: Work-in-Progress Stages
This short lippan art tutorial in pictures shows the same board at three stages. Follow the full written steps further down.
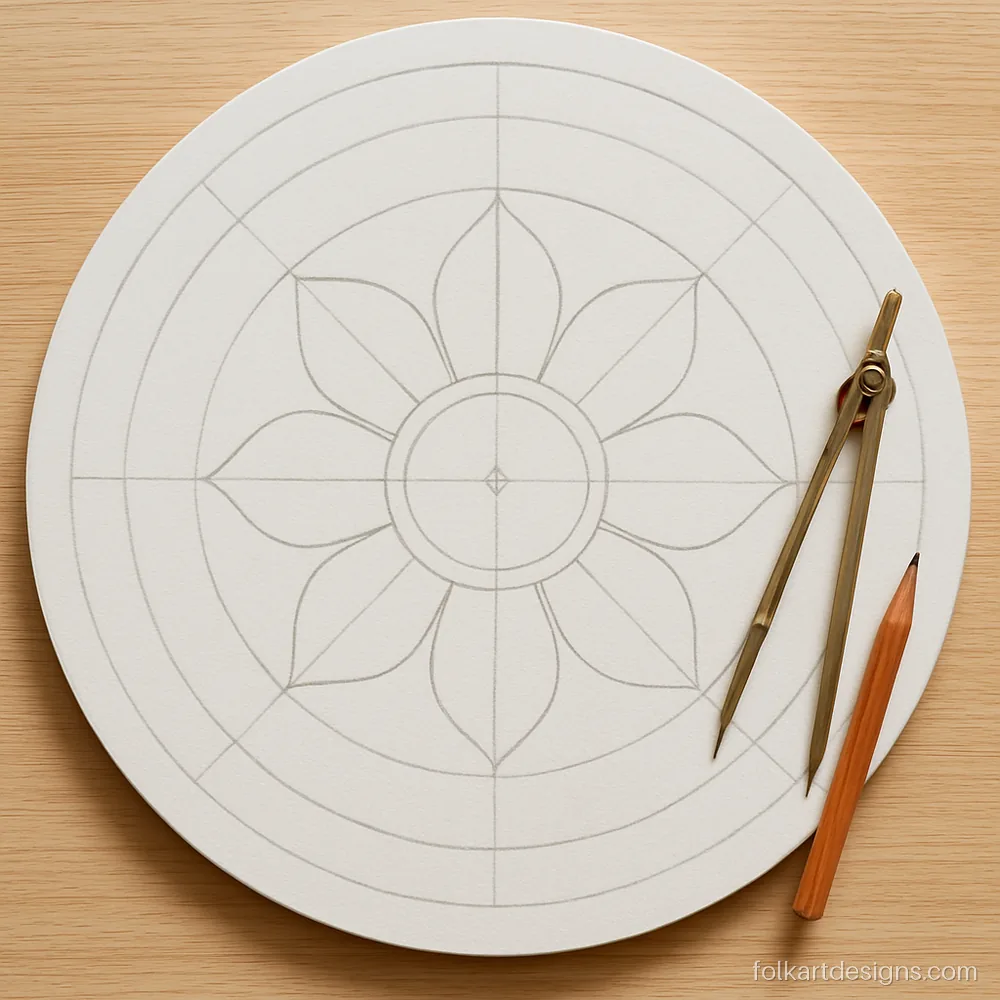
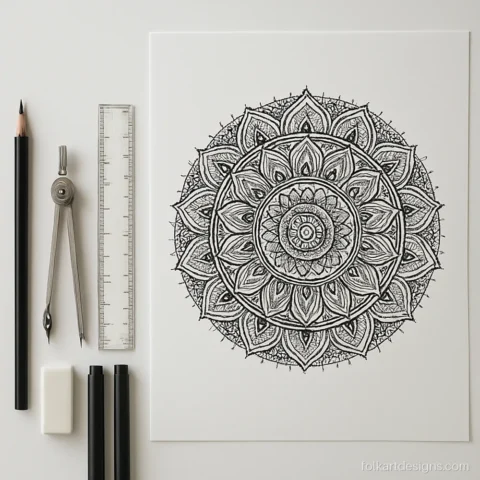
Stage one is drawing. A centre point, three guide circles and eight symmetry lines give you a grid for every coil and mirror.
Artist tip Draw lightly with an HB pencil. Dark lines can show through thin white clay.
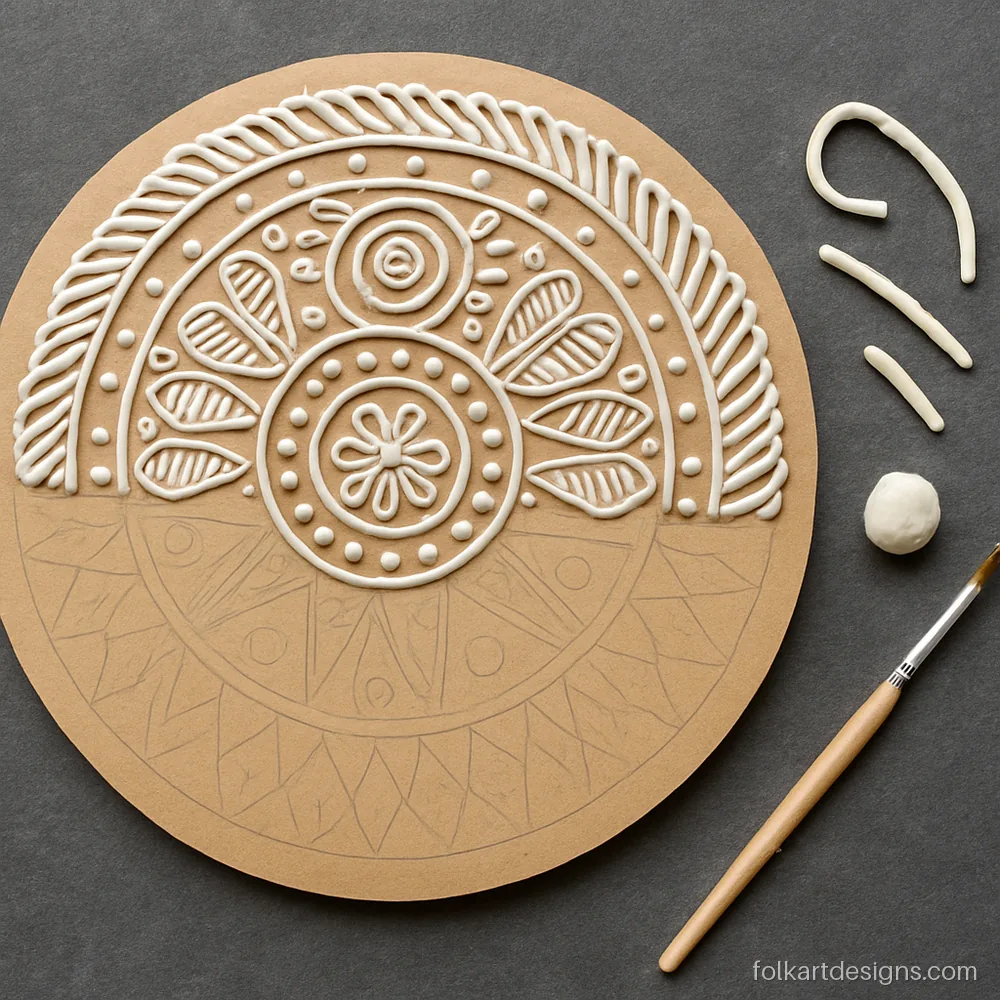
Stage two is coiling. Thin coils sit on every pencil line and are pressed flat on the inside edge so mirrors have a snug wall to rest against.
Artist tip Wet the board slightly with a brush before laying coils. They grip better and crack less.
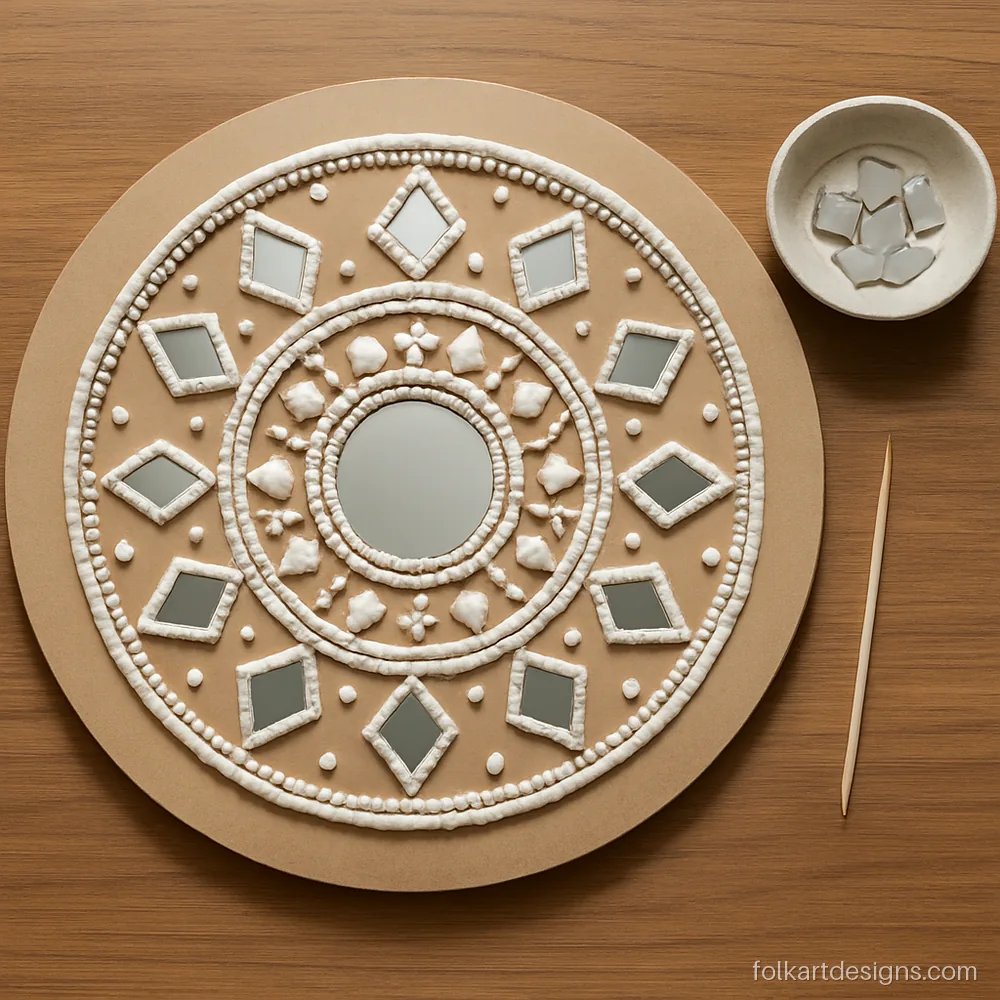
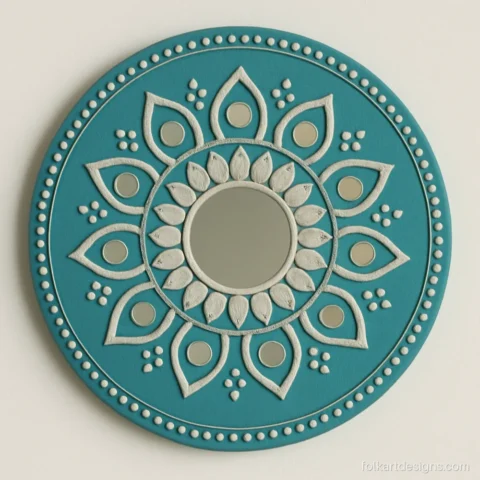
Stage three: mirrors go in while the clay is still soft, then the board rests flat. The finished piece is a full white and silver mandala.
Artist tip Press each mirror gently with a toothpick end. Fingers leave prints in soft clay.
Which Clay Is Used in Lippan Art
In Kutch, the clay used in lippan art was simply the local earth mixed with dung and a little water. The dung adds fibre, so the mud holds its shape and does not crumble when it dries. This is true kutchi lippan mud work, and it belongs on a mud wall that breathes along with it.
Hobby pieces need something cleaner and lighter. You have two good choices:
- Air-dry clay: soft, white, easy to roll. Dries in 24 to 48 hours. Best for beginners and kids' projects with an adult nearby.
- Shilpkar clay: a two-part clay you knead together. Sets harder and resists chipping. Gives you about 40 minutes of working time, so mix in small batches.
Whichever you pick, test a small coil first. If it cracks when you bend it into a ring, add a few drops of water and knead again. Lippan kaam clay should feel like soft dough, not sticky and not dry.
How to Do Lippan Art Step by Step
Follow this lippan art tutorial for your first board. Plan for two sittings of two hours each, plus drying time.
- Prime the board. One coat of matt acrylic. Let it dry for 30 minutes.
- Draw the grid. Mark the centre, draw three or four guide circles with a compass, then add 8 or 12 symmetry lines with a ruler.
- Sketch the design. Petals, arches, small circles for mirrors. Keep shapes simple on your first try.
- Place mirrors loosely. Lay them on the drawing without glue to check spacing. Adjust the sketch if a ring looks crowded.
- Roll coils. Thin, even coils about 3 mm thick. Roll a few at a time so they stay soft.
- Fix the coils. Brush a little glue on each line and press the coil on. Smooth the joins with a damp brush.
- Set the mirrors. Dab glue on the back, place each mirror inside its coil frame and press with a toothpick.
- Add dots and details. Tiny clay balls between petals and on the outer ring fill empty spaces.
- Dry flat. Leave the board flat, away from direct sun and fans, for 24 to 48 hours.
- Finish. Wipe each mirror with a dry cotton bud. Paint the clay if you like, then seal it.
Want something bolder after your first board? Our modern lippan art page shows painted and coloured versions.
How to Do Lippan Art on Wall
Working directly on a wall is closer to the original craft, but it needs more care. Start with a sound, dry, plastered wall. Fresh paint should cure for a week before you start.
- Draw the design with a pencil and a string compass pinned at the centre.
- Use shilpkar clay rather than air-dry clay. It grips vertical surfaces better and does not sag.
- Work in small areas, roughly 30 cm at a time, from the top down so crumbs do not fall onto finished parts.
- Push mirrors in firmly with a dab of strong glue behind them.
- Seal with clear matt varnish once fully dry.
If you are not ready for a wall, a large board hung with two hooks gives the same effect and can move house with you. Ideas for wall layouts are on our mandala wall art page.
Drying, Sealing and Care
Air-dry clay feels dry on top in about six hours, but the inside needs a full day or two. Hanging it too early makes coils slide and mirrors fall out. Keep the piece flat in a shaded room.
Once it is dry, you can paint the clay with acrylics. Thin the paint slightly with water so it flows into the grooves. Then brush on one coat of clear matt varnish. This seals the clay against humidity and makes dusting easier.
For care, dust weekly with a soft dry brush. Wipe mirrors with a dry cloth only. Never wet the clay. Keep lippan pieces away from bathrooms and kitchen stoves where steam and grease build up. Small chips can be filled with a bit of fresh clay and touched up with paint.
Questions about these designs
What are the materials required for lippan art?
You need an MDF board, lippan art clay, small glass mirrors, white craft glue, a pencil, a compass and a few toothpicks. A damp brush and clear varnish help with finishing. Most of these come in a single lippan art kit.
Which clay is used in lippan art?
Traditionally, local clay mixed with dung was pressed onto mud walls in Kutch. For hobby work on MDF, air-dry clay and shilpkar clay are the usual choices. Air-dry clay is softer and easier for beginners. Shilpkar clay sets harder.
How long does lippan art take to dry?
Air-dry clay is touch dry in about six hours but needs 24 to 48 hours to dry fully. Shilpkar clay sets in a day. Keep the piece flat and out of direct sun while it dries.
Can I do lippan art without a kit?
Yes. Buy clay, mirrors and an MDF board separately, and use a compass and pencil you already own. A kit simply saves you from guessing quantities on your first piece.
Is lippan art the same as Kutch mud work?
Yes. Lippan kaam, Kutch mud work and mud mirror work all mean the same craft from Gujarat. Read more on our lippan art page.
How do I stop mirrors falling out of lippan art?
Set each mirror while the clay frame is still soft and put a dab of glue on the back. Let the piece dry flat for the full time before hanging it. Shilpkar clay holds mirrors more firmly than air-dry clay.